Mon 26 August 2024
| Modified: Fri 30 January 2026
Introduction
OXO is a state-of-the-art security scanning framework known for its simplicity. However, the power and versatility of OXO's Command-Line Interface (CLI) often pose challenges for users unfamiliar with complex command-line operations.
To address this, OXO Titan was developed as an intuitive User Interface (UI) to transform user interaction with OXO. This OnPrem UI encapsulates OXO's capabilities within an accessible interface, democratizing advanced security scanning techniques. By bridging the gap between the myriad of complex tools and a simple UI, OXO Titan streamlines operations and enhances the user experience.
This article explores OXO Titan's journey from concept to reality, highlighting its key features and presenting a practical user workflow example. We examine how this UI simplifies the setup and execution of vulnerability scans, making it an indispensable tool for both novice and experienced security professionals.
Key Features
OXO Titan UI
The OXO Titan UI brings the capabilities of the OXO API to a graphical interface, making it accessible to a wider range of users. You can access the UI by running the oxo serve command. In the figure below, OXO serves the UI on http://http://0.0.0.0:3420.
Before running the server, install the requirements with: pip install ostorlab[serve].

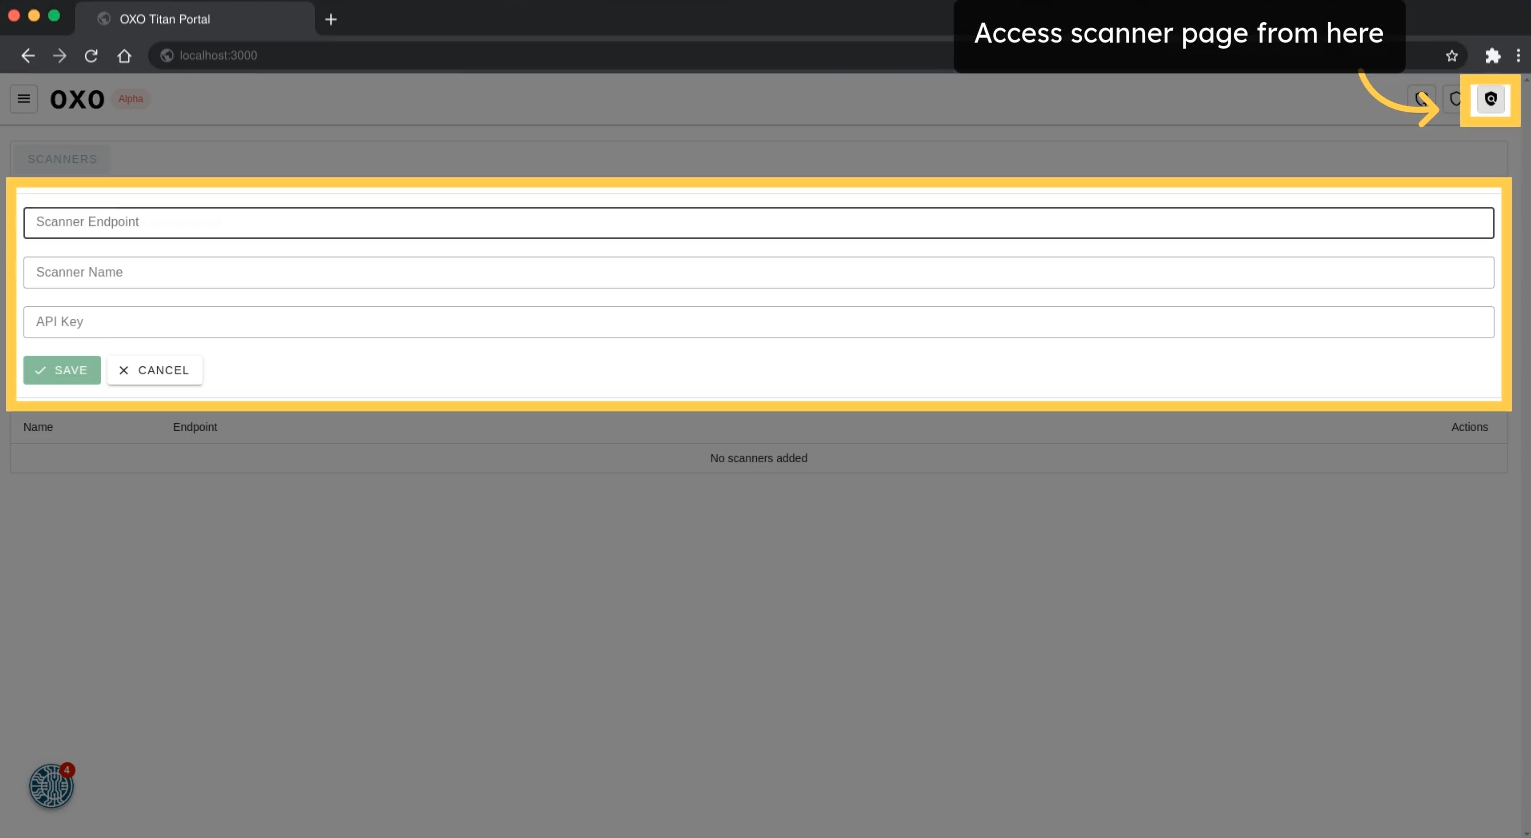
Scanner and Scans Management:
In OXO Titan, a scanner serves as a pivotal component where the scans are taking place. It can be a local or external machine where the OXO server is running and operates independently, allowing customization to meet diverse security requirements.
To set up a scanner, click on the scanners button, then enter details like Scanner Endpoint and API Key, obtainable from running the oxo serve command.
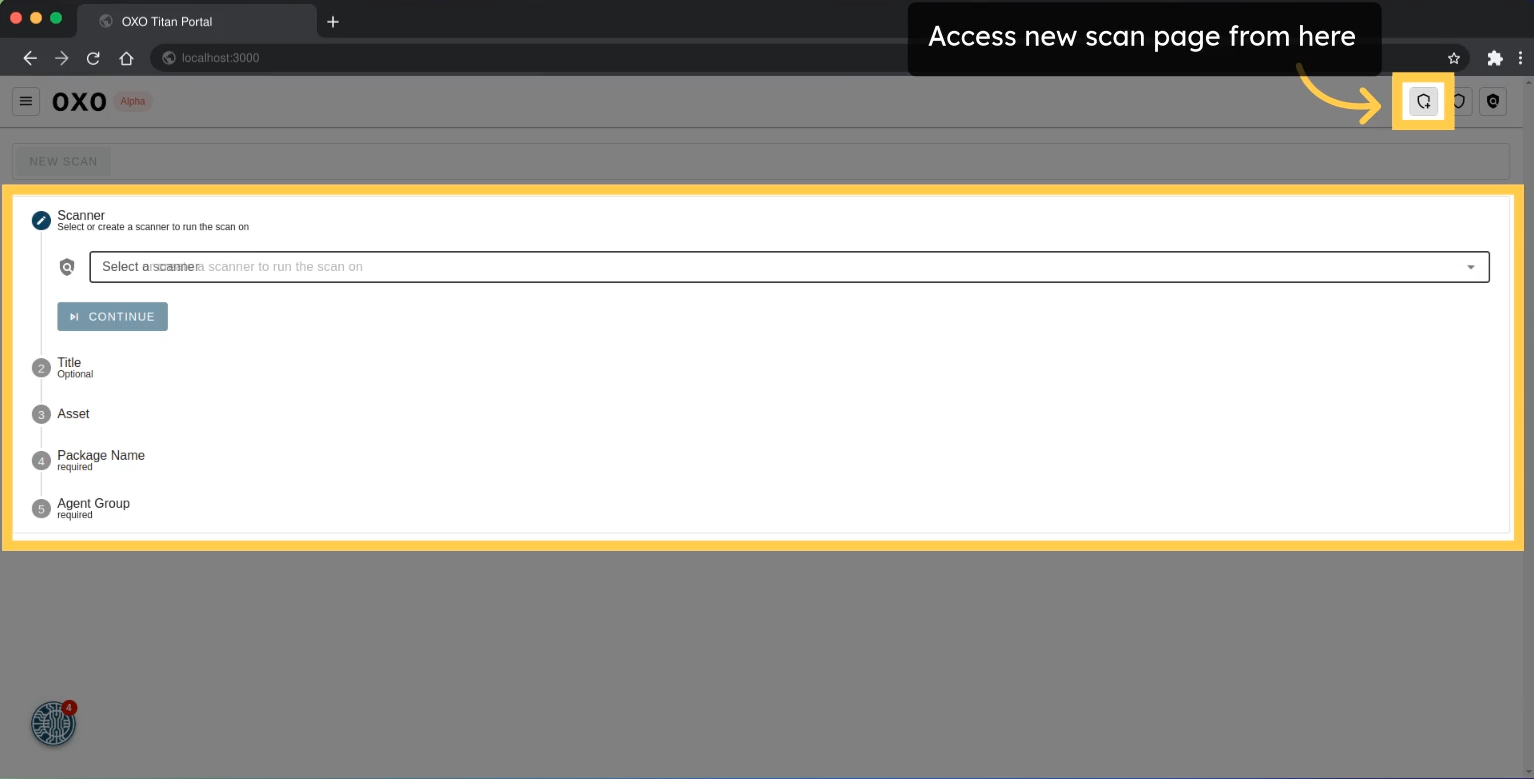
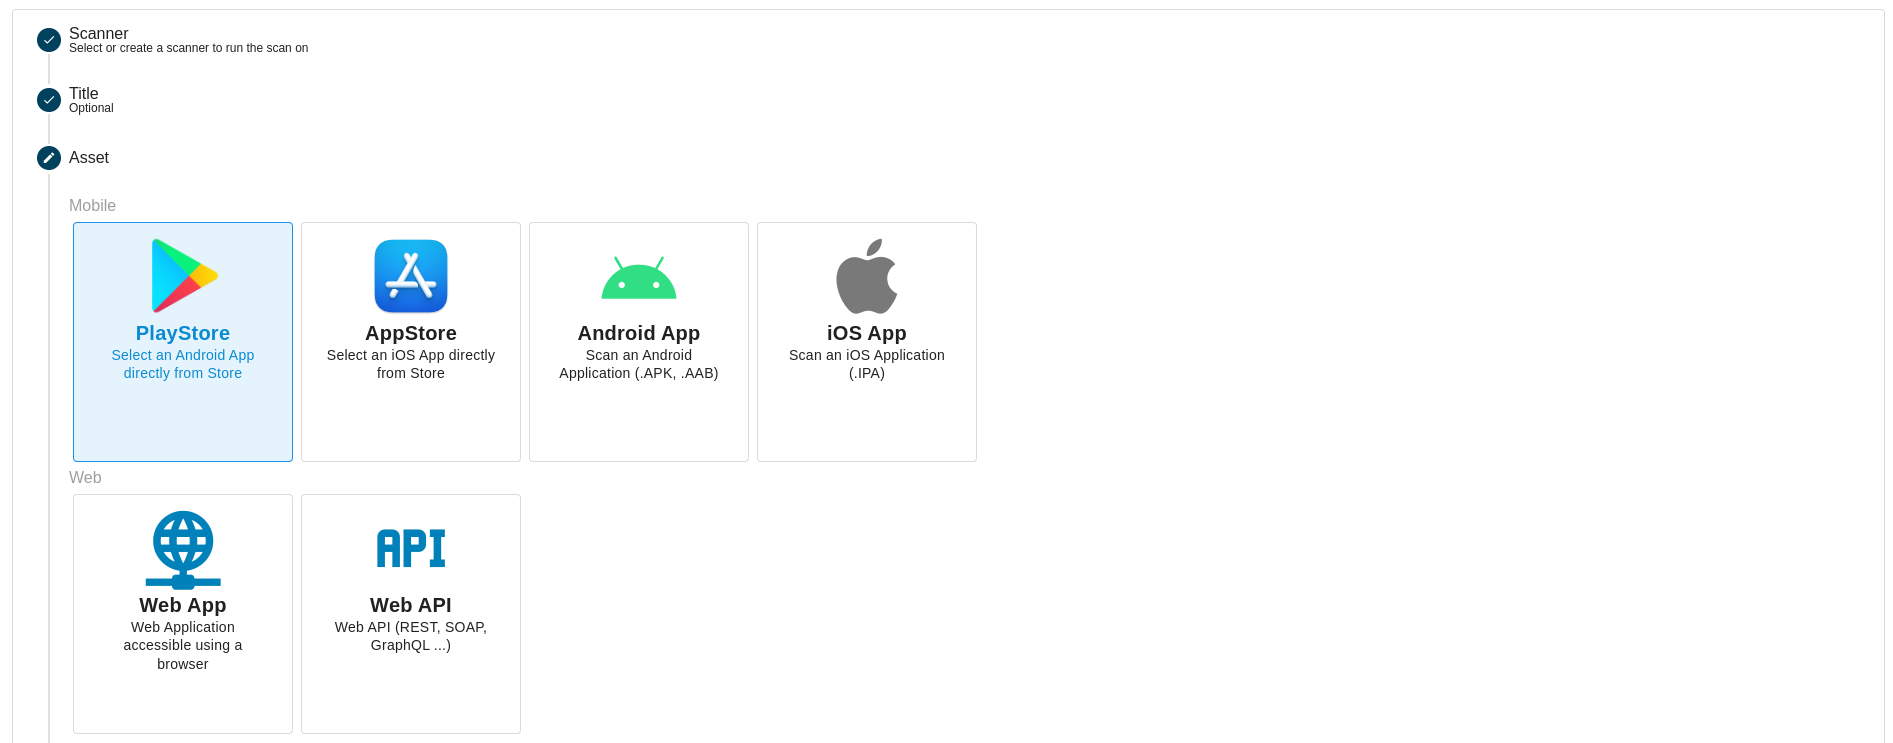
Running Scans:
After setting up the scanner, start running scans using various types of assets. To run a scan, provide the following details:
- Scanner: Select the scanner to run the scan on.
- Title: (Optional) Give a title or name to the scan.
- Asset: (Required) Specify the asset to be scanned (e.g., Android/iOS application, web application, API, or network).
- Asset Definition YAML File: Optionally, run scans on multiple asset types using this file.
- Agent Group: (Required) Select the agent group on which the scan will run. Refer to the agent group documentation for more information on what an agent group is and how to create one.
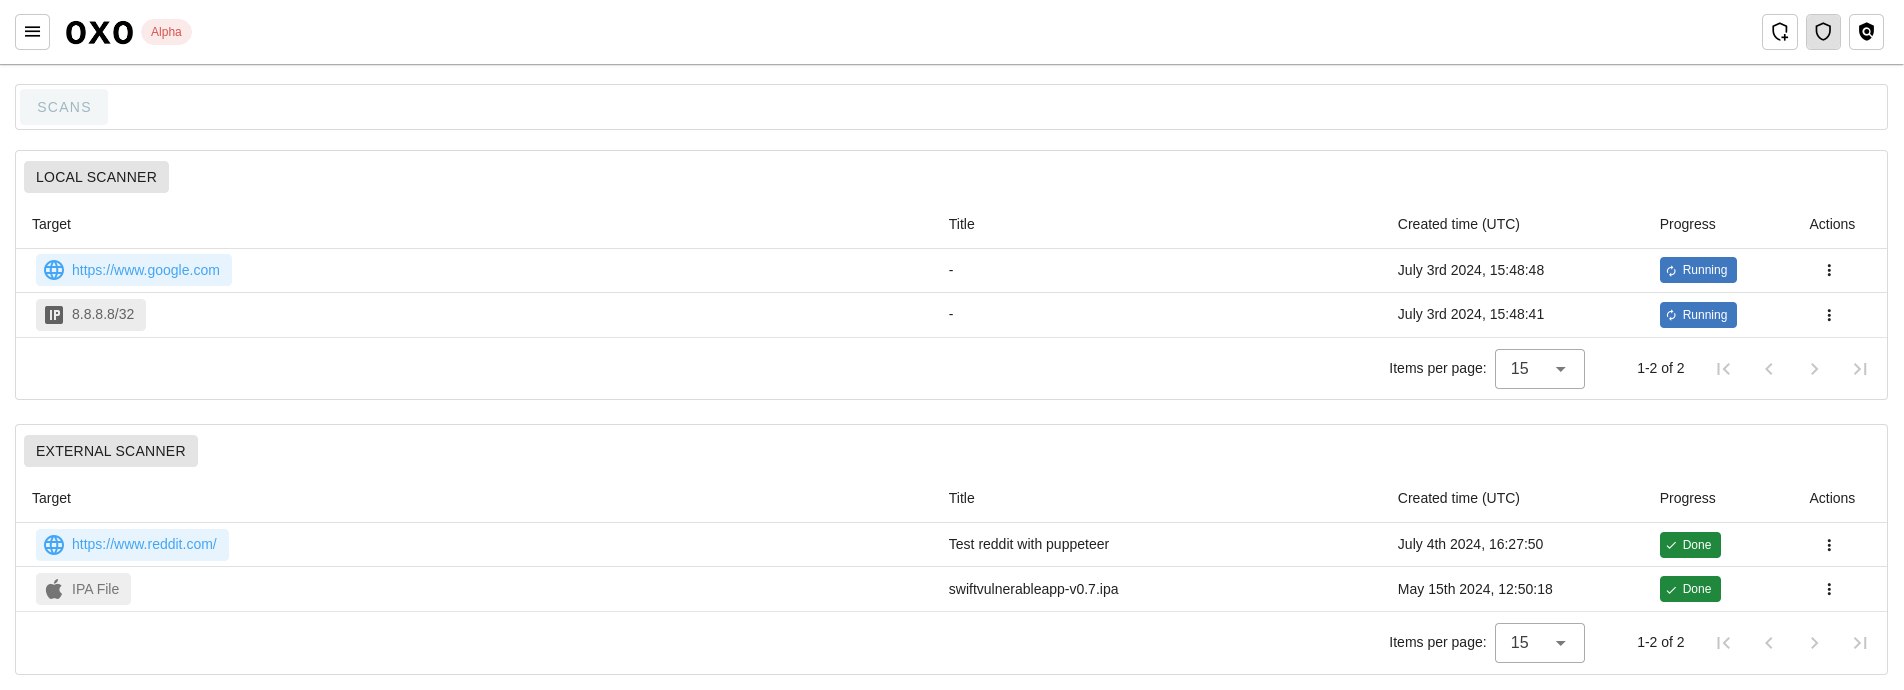
After running scans, you can access them from an intuitive dashboard that provides a centralized view of all scanning activities across the scanners configured by the user.
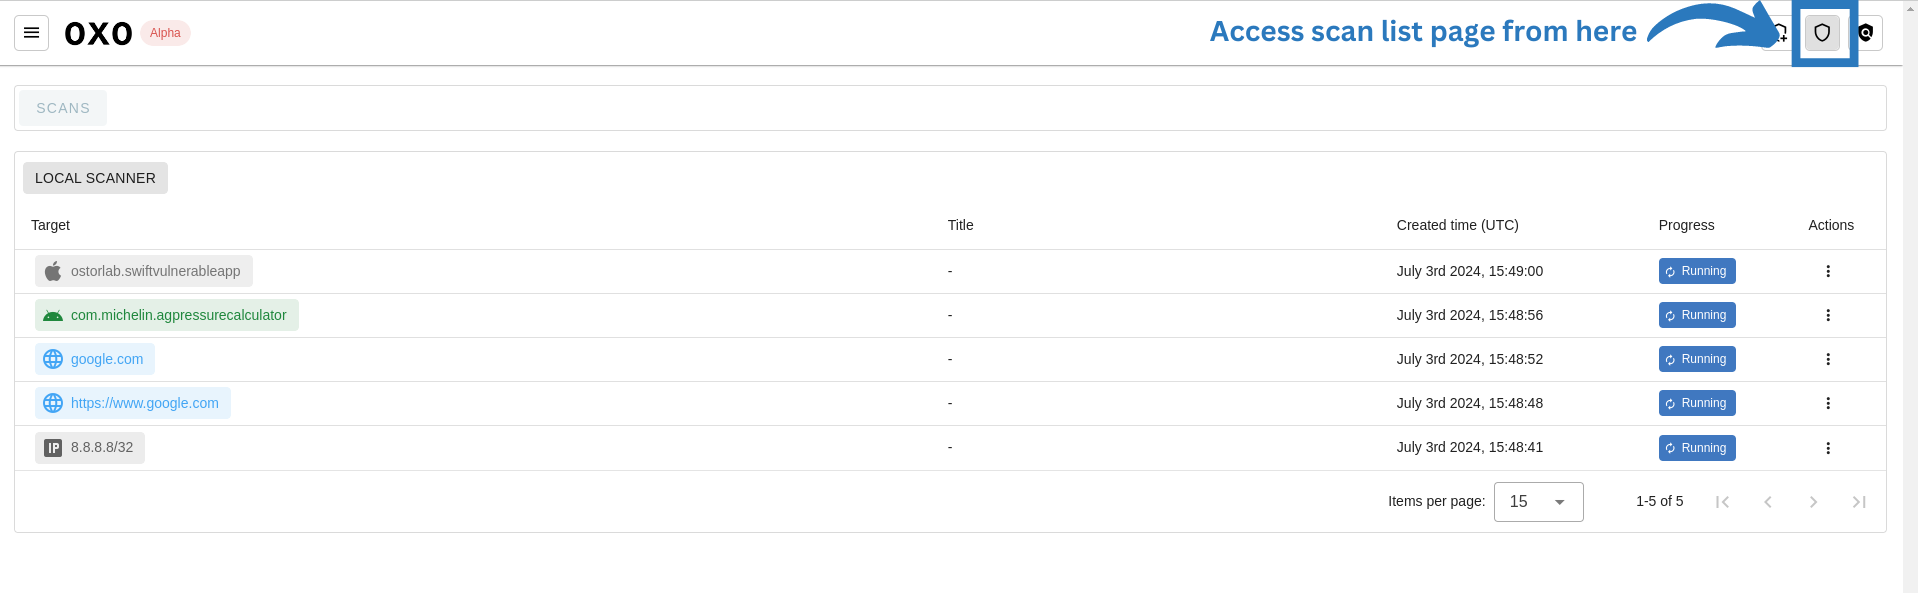
You can see the scan details and the vulnerabilities reported by clicking on it.
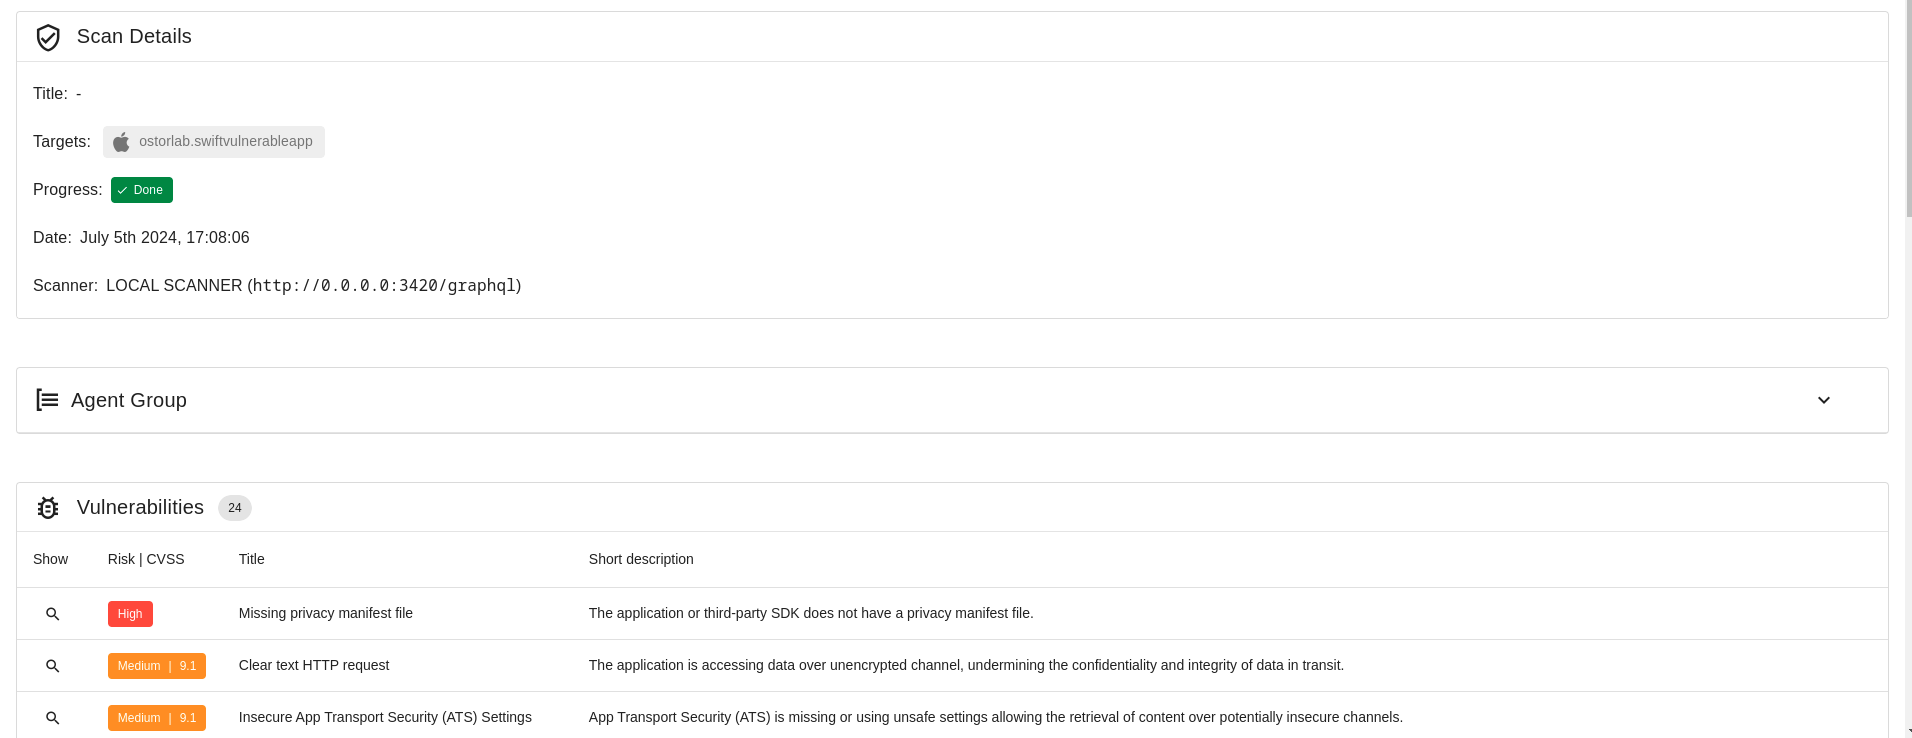
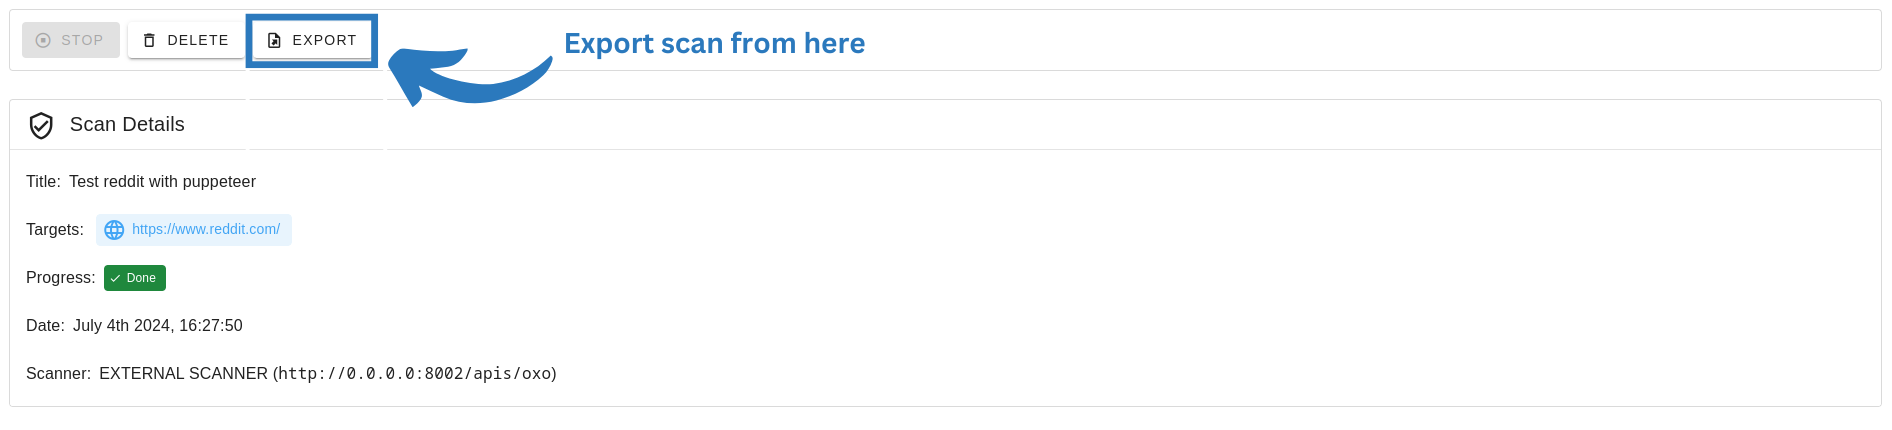
Furthermore, users can locally cache and export full scan results by clicking on the export button in the scan details page.
Check the UI documentation for more details about the OXO Titan UI capabilities.
OXO API
The OXO API is a GraphQL API that expands upon the Command-Line Interface (CLI) capabilities, making it easier to perform and manage various scanning activities.
It offers a range of features that simplify and enhance user interactions with the OXO framework.
For example, to fetch scans and related vulnerabilities with the CLI commands, you need first to list scans using oxo scan list, then pass the scan ID to oxo vulnz list -s <scan_id>. You should use oxo vulnz describe -v <vuln_id> for details of a vulnerability.
However, a simple GraphQL query achieves the same results with the OXO API. Here's how you can query scans and their vulnerabilities with pagination:
query Scans {
    scans(page: 1, numberElements: 10) {
        scans {
            id
            title
            createdTime
            progress
            vulnerabilities(numberElements: 1, page: 2) {
                vulnerabilities {
                    id
                    technicalDetail
                    riskRating
                    detail {
                        title
                        shortDescription
                        description
                        recommendation
                    }
                }
            }
        }
    }
}
Here are the key use cases and functionalities provided by the OXO API:
| Action | Type | Argument | Comment |
|---|---|---|---|
RunScan |
Mutation | title: String, assetIds: [Int]!, agentGroupId: Int! |
|
StopScan |
Mutation | scanId: Int! |
|
DeleteScan |
Mutation | scanId: Int! |
|
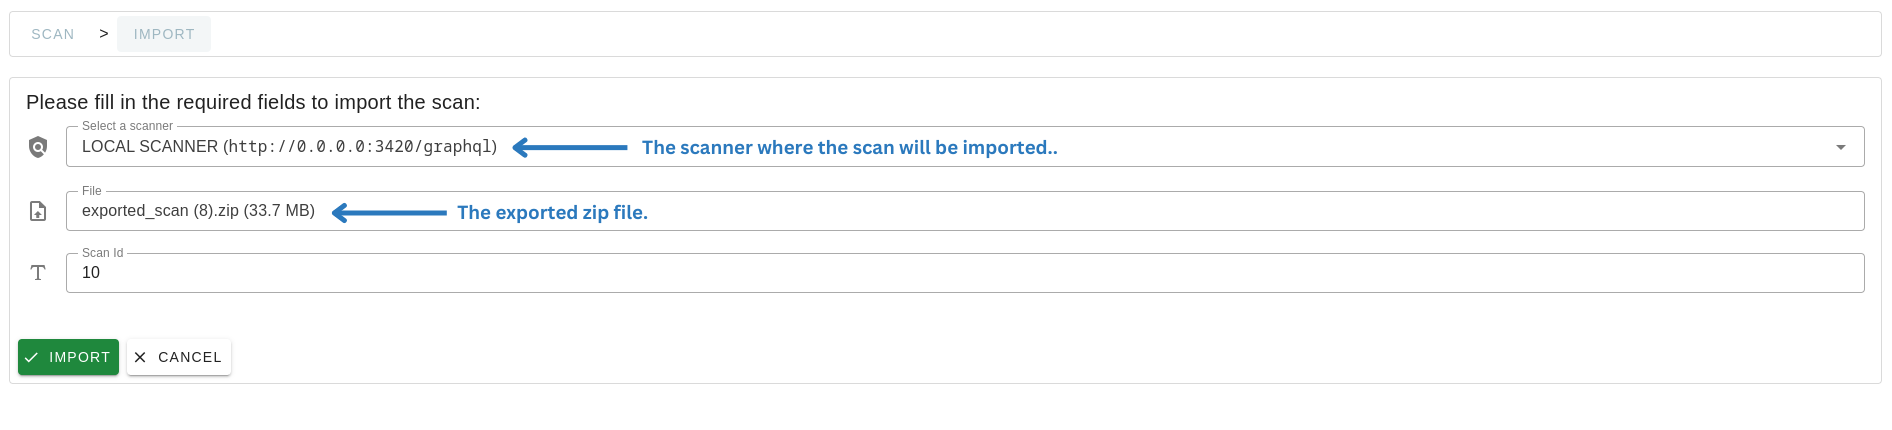
ImportScan |
Mutation | file: Upload!, scanId: Int |
Import scan from a zip file. |
ExportScan |
Mutation | scanId: Int!, exportIde: Boolean |
Export scan to a zip file. |
CreateAssets |
Mutation | assets: [OxoAssetInputType]! |
|
PublishAgentGroup |
Mutation | agentGroup: OxoAgentGroupCreateInputType! |
|
DeleteAgentGroup |
Mutation | agentGroupId: Int! |
|
Scans |
Query | scanIds: [Int], page: Int, numberElements: Int, orderBy: OxoScanOrderByEnum, sort: SortEnum |
Query scans and reported vulnerabilities. |
Scan |
Query | scanId: Int |
|
AgentGroups |
Query | search: String, page: Int, numberElements: Int, orderBy: AgentGroupOrderByEnum, sort: SortEnum, agentGroupIds: [Int], assetType: AssetTypeEnum |
Query agent group with all associated agents and their arguments. |
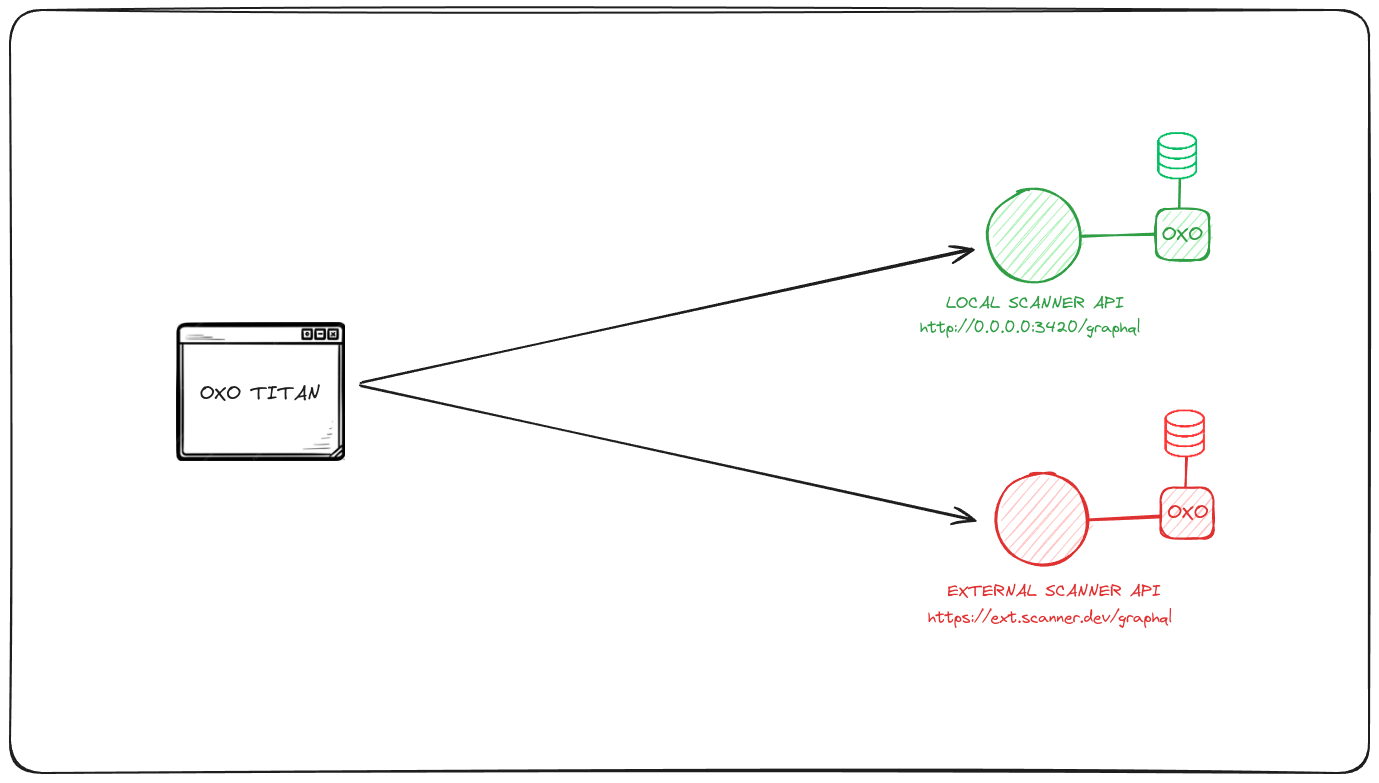
Design and Architecture
Consider the following scenario where a User manages two scanners, one internal and one external:
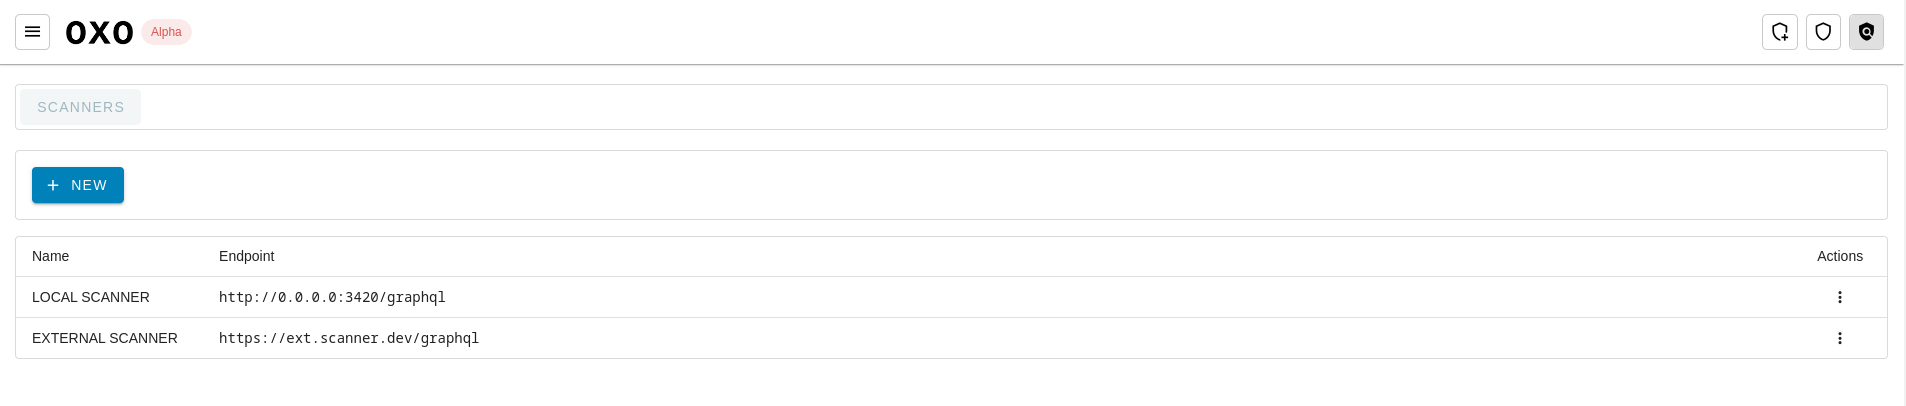
Access and Setup
The User accesses the UI and adds scanner instances:
Scan Operations
The User can perform actions such as creating scans using various types of assets, including Android Store for assets from Google Play Store, Android Files like Apk or Aab, iOS Store for assets from Apple App Store, iOS IPA File, Web App for web application scans, Web API for API scans accessed over the web, and Network.
After running scans, the User can view and review them on the scans list page, which features tabs for each scanner and the scans executed within it.
The User can then export a scan by clicking on the “Export” button in the scan details page. For example, we are going to export the scan of the Reddit web asset from external scanner and import it into the local scanner:
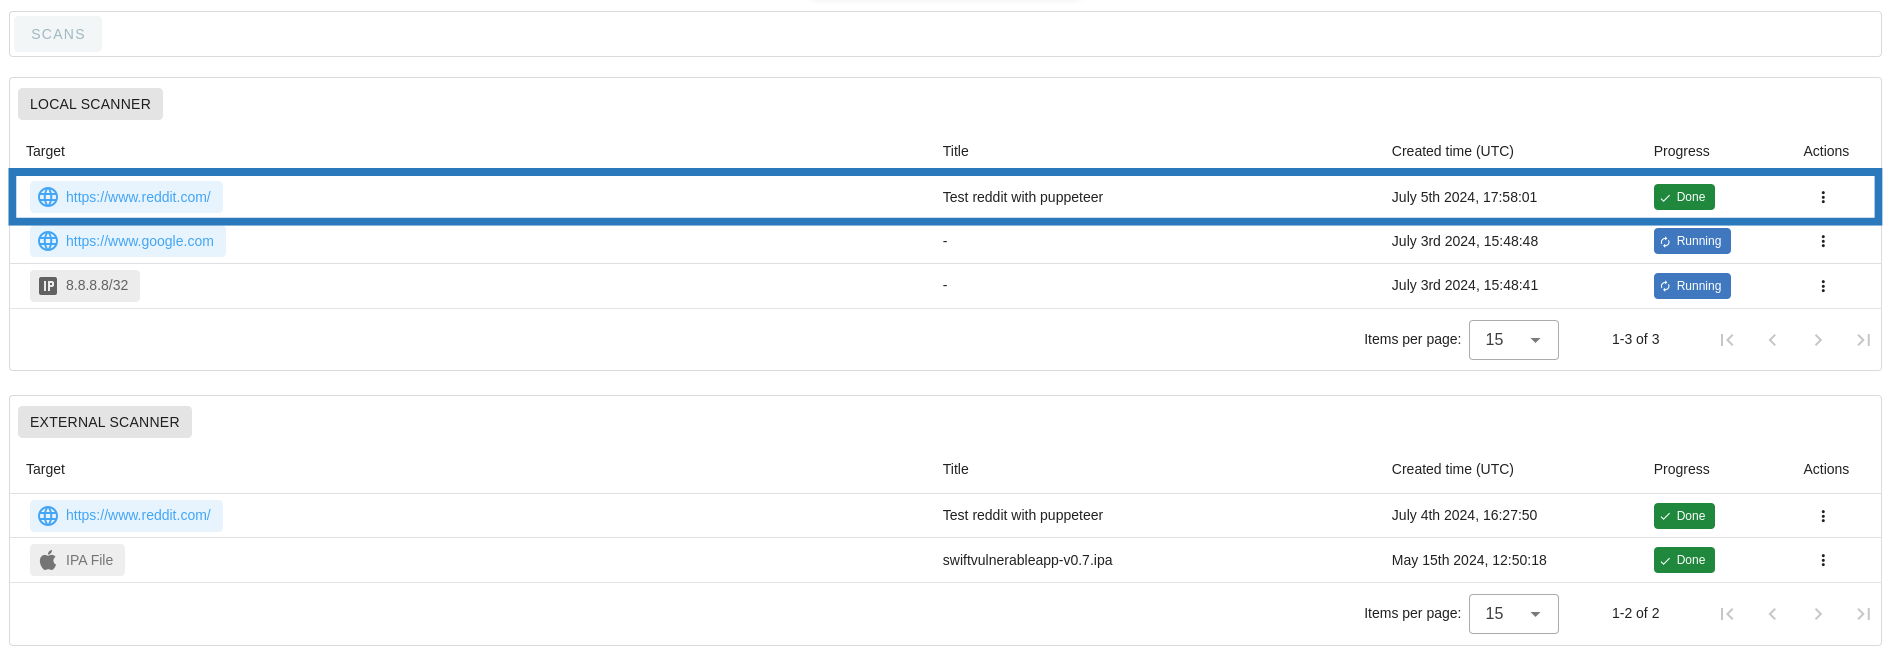
The user can verify that the scan is imported from the scans list page:
Conclusion
OXO Titan marks a substantial improvement to the OXO open-source framework, offering a streamlined, user-friendly interface that simplifies vulnerability scanning. By enhancing accessibility and functionality through intuitive design, OXO Titan empowers users to manage multiple scanners, run scans on various asset types, import/export scan data, and access detailed reporting with ease. This advancement ensures organizations can effectively enhance their operational efficiency and security capabilities within the OXO ecosystem.