Thu 27 October 2022
85% of teams who integrated security scanning into their CI/CD pipeline respect their patch SLO, fix vulnerabilities faster, change code more often and express a better understanding of their code base.
This article will cover the main challenges when implementing a CI/CD pipeline for mobile applications. We will also provide examples of how you can implement continuous integration pipelines for Android and iOS applications in the most used Mobile CI/CD tools.
Before incorporating security checks into our CI/CD pipelines, we have to ensure that they are built correctly and stable and that we have the right observability to fix them in case something breaks.
Here are some of the common challenges we see when adopting CI/CD for mobile applications:
-
Lack of CI/CD expertise:
Most DevOps solutions require advanced CI/CD expertise to properly set up, customize, and maintain automated workflows and processes. Most application developers need time and experience to learn this skill set. -
Unclear ownership:
Implementing CI/CD is not a one-time task. As with every code written by humans, it can fail, break or behave unexpectedly. So, poor CI/CD pipeline management or implementation often makes it a cumbersome task to identify the failure causes immediately. This, in turn, makes it harder to redirect to the concerned teams for fixing code errors.
-
Restricting to Dev and QA Vs Prod environment:
A mobile application usually consists of a client binary installed on the device and a backend to communicate with via an API. The CI/CD pipeline might have different configurations and environments to run the tests. One common mistake is to test using Dev and QA environments, and neglect the differences with the Prod environment. So the code in production becomes untested and can have errors, security issues, or unexpected errors.
-
Neglecting Dynamic analysis:
Multiple companies implement CI pipelines with only static analysis. This is mainly because of the difficulty encountered while automating the application's dynamic analysis. The Static analysis aims to analyze binaries or source codes to find known patterns of vulnerabilities. However, static analysis is known for producing too many alerts for minor software flaws and unexploited defects. This is why the OWASP standard recommends implementing both static and dynamic analysis. The dynamic analysis is designed to detect security vulnerabilities while running the application. It covers only the scope used in the application and provides high confidence about the identified issue.
-
Difficulty to run UI automation:
In a CI/CD pipeline, automating UI interactions is an important step to increase test coverage and ensure the scalability and quality of the tests. The usual challenge is automating all the UI interactions and ensuring they are stable through the different application versions, OS versions, and multiple devices.
-
Hidden limitations of CI/CD vendors:
To have a fully automated CI/CD pipeline for a mobile application, you need to conform to the mobile application's rigid operating system requirements, rigorous code signing, frequently-updated SDKs and tooling, device testing, and app store submission. So, choosing the CI/CD vendor is essential to cover your needs and ease the implementation and maintenance.
Now let’s look at how we can add the Build of a mobile application (Android and iOS) to some of the most used CI/CD platforms.
Continuous integration for Android applications using Jenkins
We will learn how to generate an Android APK from source code in Jenkins. I assume you have already installed Jenkins.
-
Step 1: Install Java JDK:
On your terminal run:
sudo apt install default-jdk
-
Step 2: Install Android SDK:
Go to Android Download page, and grab the link listed in the tableCommand line tools only>Linux. Don’t download anything. Just copy the link.
# here you paste the link you grabbed in the developer.android.com site
sudo -iu jenkins wget https://dl.google.com/android/repository/commandlinetools-linux-8512546_latest.zip
sudo -iu jenkins mkdir android-sdk
sudo -iu jenkins unzip commandlinetools-linux-8512546_latest.zip -d android-sdk

# this step is important to accept the Android SDK license
yes |sudo -iu jenkins android-sdk/tools/bin/sdkmanager --licenses
-
Step 3: Install Gradle Plugin:
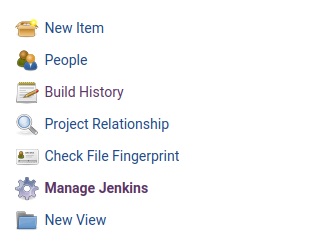
.1 Open Jenkins: Manage Jenkins >> Manage Plugins >> Available
.2 Search for Gradle

.3 Click on Install
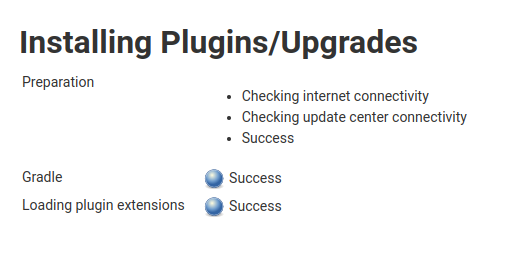
-
Step 4 Configure Jenkins:
.1 Open Jenkins: Manage Jenkins >> Configure System >> Global properties >> Environment variables

.2 Add the variables:
  # depending on your local paths
  ANDROID_HOME : /var/lib/jenkins/android-sdk
  JAVA_HOME : /usr/lib/jvm/java-11-openjdk-amd64

-
Step 5: Create Android build job:
.1 Open Jenkins: New Item
.2 Enter the job name
.3 Choose a Freestyle project and press OK
.4 Go to Source Code Management -> Check Git and fill in:
-
Repository URL: Git URL to your repo. Take this URL from GitHub. It should be a format of git@github.com:{username}/{repo}.git
-
Credentials: Select your credentials or create a new one in the credentials menu.
-
Branches to build: branch_name
.5 In the Build section, select Invoke Gradle script

.8 Fill in the name of your tasks
.9 In the Post-build Actions fill in Archive artifacts: **/*.apk
.10 Press Save
-
Step 6: Start the Build:
From the job dashboard, click Build Now, and you will see the job run. After successfully building, you can see generated Android app in the project information.

Continuous integration for iOS applications using Jenkins
-
Step 1: Installation of Jenkins with XCode plugin (requires MacOS):
.1 Open Jenkins: Manage Jenkins >> Manage Plugins >> Available
.2 Search for Xcode integration
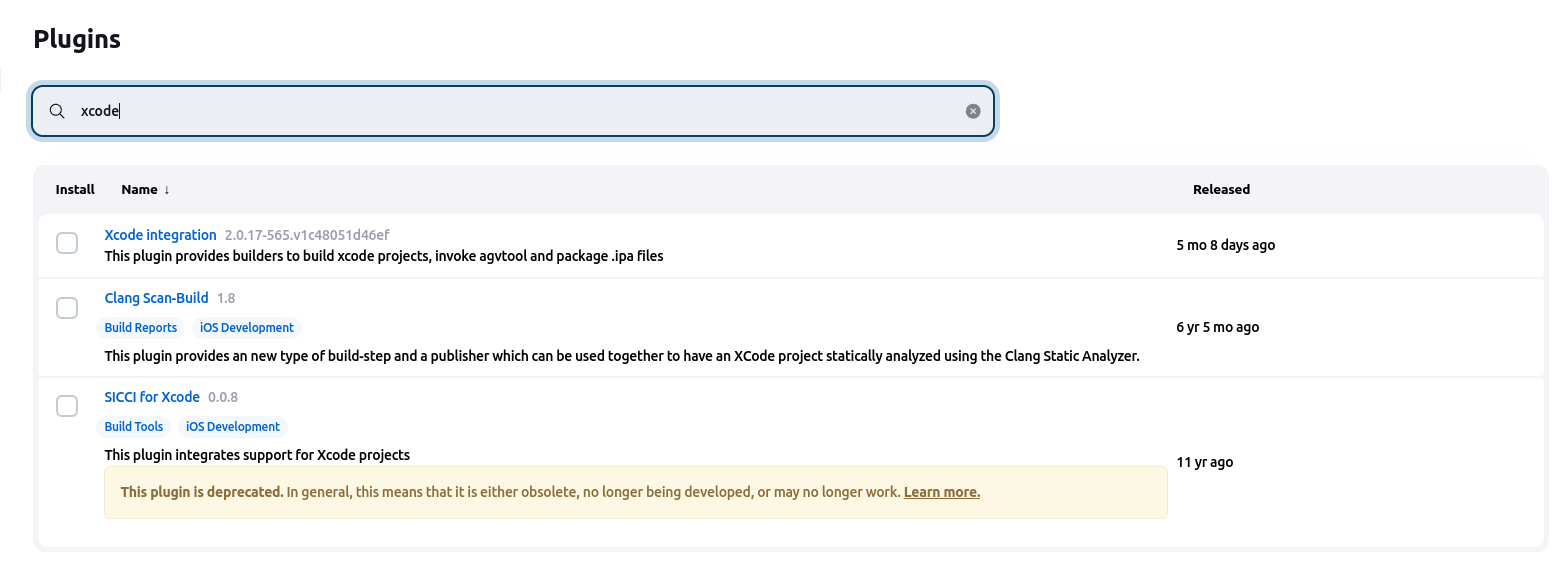
.3 Click on Install
-
Step 2: Create a Development team from Jenkins Global configuration:
.1 Open Jenkins: Manage Jenkins >> Configure System
.2 Go to the Xcode builder section
.3 Go to the Apple Development Teams section and click on Add button
.4 Fill in the two fields Team Name and Development Team ID

.5 Add a Keychain section
.6 Fill in the values for Keychain Name and Keychain password (The keychain path would already be there)
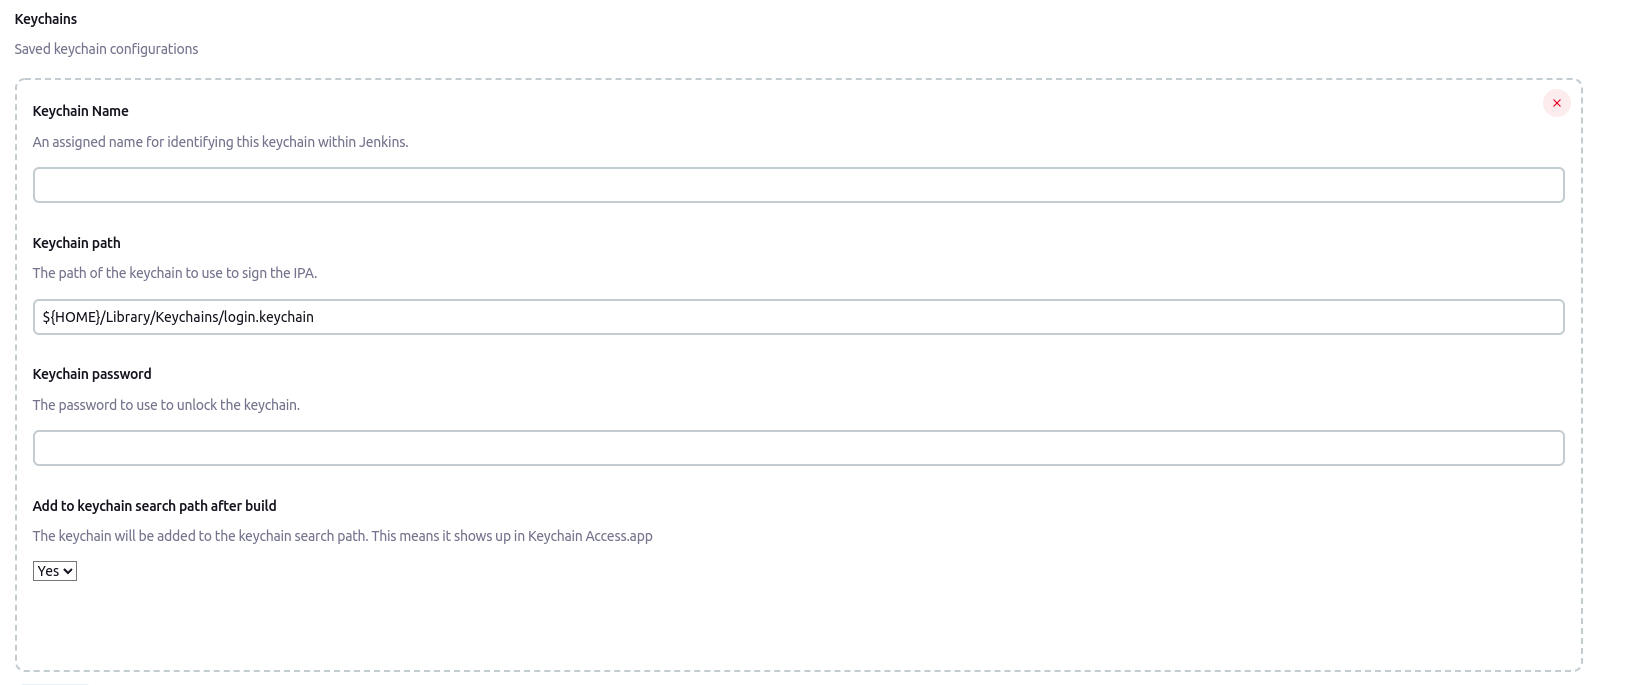
.7 Apply and Save
-
Step 3: Configure Jenkins Job to clone the repository:
.1 Go to the project path in Jenkins workspace (/Users/Shared/Jenkins/Home/workspace)
.2 Open the project using Xcode
.3 In the General tab on Xcode, check that the Provisioning profile and all the information are correct
.4 You can try to build the project using Xcode to make sure all the information is correct
.5 The checkbox Automatically manage signing should not be checked
.6 Note the Team Name and the Bundle Identifier since we will be using them in the Jenkins configuration
-
Step 5: Configure the build in Jenkins:
.1 Open Jenkins, go to your project, and click on configure
.2 In the Build section, click on the build step button and select the Xcode option. It will add the Xcode-related fields.
.3 In General build settings, click on the Settings button
.4 Select the Development Team that you have recently added to Jenkins Global Configuration
.5 Fill Xcode Schema File:
.6 Select Pack application, build and sign .ipa? Option.

.7 The export method of the .app to generate the .ipa file. It Should be one in ‘development’, ‘ad-hoc’, ‘enterprise’ or ‘app-store'.
.8 .ipa filename pattern: A pattern for the IPA file name. You may use ${VERSION} and ${BUILD_DATE} (yyyy.MM.dd) in this string.
.9 Go to Code signing & OS X keychain options
.10 Select Manual signing
.11 Fill in the Bundle ID and Provisioning profile UUID (You can find it from your provisioning profile .mobileprovision file)
.12 Select Unlock Keychain
.13 Select the recently created Keychain value from the drop-down menu
.14 Go to the Advanced Xcode build options section
.15 Fill in the Xcode Workspace File fields:Xcode Project Directory: $WORKSPACE
.16 Press Apply and Save
-
Step 6: Start the Build:
From the job dashboard, click Build Now and see the job run.
After successfully building, you can see generated Ipa app in the project information.
Continuous integration for Android applications using GitHub Actions
The runners offered by GitHub Actions allow you to run your build on Linux, Mac, and Windows.
All the runners have Java and Android already installed and configured (the list of pre-installed software is pretty long). Workers can build most Android projects out of the box without further setup.
jobs:
  build:
    runs-on: ubuntu-latest
    steps:
      - name: Checkout the code
        uses: actions/checkout@v2
      - name: Build the app
        run: ./gradlew build
Continuous integration for iOS applications using GitHub Actions
For the IPA build, we will use the task yukiarrr/ios-build-action. The action builds iOS project and can export to IPA file.
You can check the full documentation in the GitHub repository
name: Build and sign Ipa file

on:
 push:
   branches: [ main ]
 pull_request:
   branches: [ main ]

jobs:
 build:
   runs-on: macos-latest

   steps:
   - uses: actions/checkout@v2
   - name: Build and export iOS
     uses: yukiarrr/ios-build-action@v1.5.0
     with:
       project-path:
       workspace-path: ".xcworkspace path"
       scheme: "project name"
       export-method: "Choose app-store, ad-hoc, package, enterprise, development"
       configuration: "Choose Debug or Release"
       output-path: artifacts/output.ipa
       p12-base64: ${{ secrets.P12_BASE64 }}
       certificate-password: ${{ secrets.P12_PASSWORD }}
       mobileprovision-base64: ${{ secrets.ADHOC_MOBILEPROVISION_BASE64 }}
       code-signing-identity: ${{ secrets.CODE_SIGNING_IDENTITY }}
       team-id: ${{ secrets.TEAM_ID }}
Continuous integration for Android applications using Azure DevOps
-
Step 1: Prepare the pipeline:
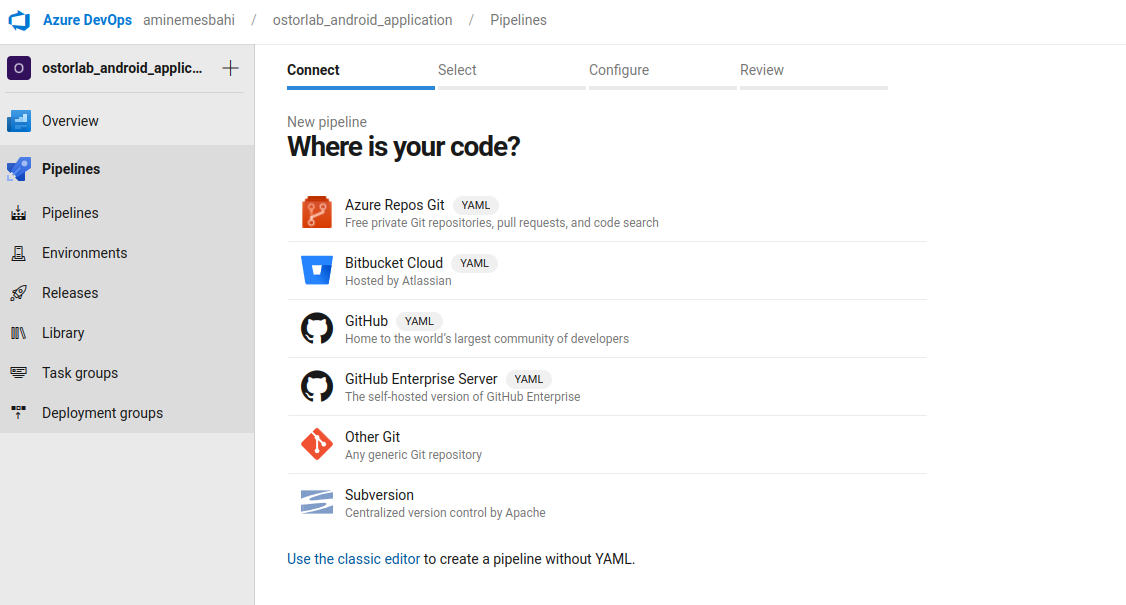
.1 Open your project and navigate to the Pipelines section on the left panel
.2 Click on Create Pipeline
.3 Select your Git repository
An empty Yaml pipeline is generated. Now we need to build the binary file using Gradle.
-
Step 2: Building Apk file using Gradle task:
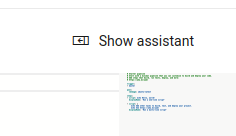
.1 Click on show assistant
.2 Search for Gradle
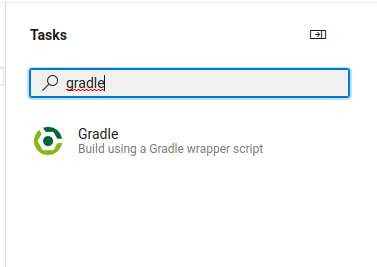
.3 You can turn off Publish to Azure Pipeline under JUnit Test Results section
.4 Set your task name to build the file
.5 Click Add button
.6 Click Save to save our CI pipeline
You can also add the tasks' Copy files' and 'Publish build artifacts' to inject the generated file into the pipeline if you want to run other jobs on the file.
Continuous integration for iOS applications using Azure DevOps
-
Step 1: Prepare the pipeline:
.1 Open your project and navigate to the Pipelines section on the left panel
.2 Click on Create Pipeline
.3 Select your Git repository
An empty Yaml pipeline is generated. Now we need to build the binary file using Gradle.
-
Step 2: Building Apk file using Gradle task:
We need the provisioning profile and the iOS certificate to sign the Ipa file.
To upload them to our pipeline, we will be using the Secure files section:
.1 Go to pipelines -> Library -> Secure files

.2 Upload your provision file. In my case, I will call it my_provision_profile_ostorlab
.3 Export the certificate public key (.p12) and upload it. I will call it my_certificate.p12
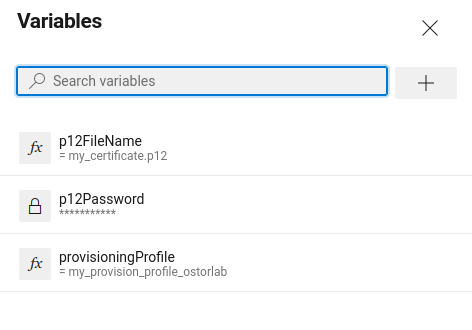
.4 Go back to your pipeline and add three variables:
p12FileName = my_certificate.p12
p12Password = my_certificate_password
provisioningProfile = my_provision_profile_ostorlab
.5 Click on show assistant
.6 Search for install apple provisioning
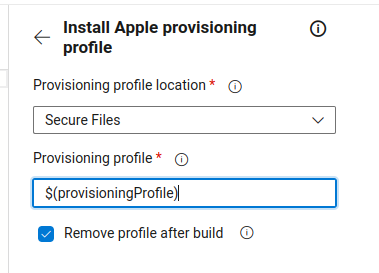
.7 Fill provProfileSecureFile with the variable $(provisioningProfile)
.8 Click Add
.9 Click on show assistant
.10 Search for install apple certificate
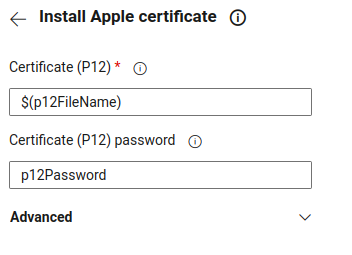
.11 Fill the file name and the password with the variable contents
.12 Click Add
-
Step 3: Build and sign the Ipa file:
To build the .ipa file, we need to use macOS as vmImage.
.1 We need to add the build configuration as a variable. You can set the value as Debug or Release.
.2 We need to add the SDK variable. From the macOS Terminal application, run xcodebuild -showsdks to display the valid list of SDKs.
.3 Click on show assistant
.4 Search for Xcode
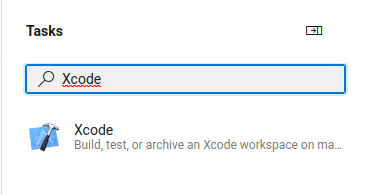
.5 In Signing style, select Manual signing
.6 Fill in Signing identity with the value $(APPLE_CERTIFICATE_SIGNING_IDENTITY). This variable corresponds to ‘Install Apple Certificate’ we have added previously
.7 Fill in Provisioning profile UUID with the value $(APPLE_PROV_PROFILE_UUID) defined by the task Install Apple Provisioning Profile’.
.8 Click Add
.9 Click save to save our CI pipeline.
If you run your build for the first time, it will fail, asking you to grant access to the variables and the secure files. Click on Authorize resources and rerun your build.
In this article, we went through some challenges when implementing the CI/CD pipelines. We also discussed building the APK and the IPA mobile applications in the most used CI platforms. The CI implementation should be completed with a CD pipeline to automate the deployment after the review process. Since the Mobile application space has multiple frameworks to develop and build the application, the CI implementation can vary depending on the framework tools.
The following article will cover the flutter framework and how you can automate the Build in those CI/CD platforms.
Table of Contents
- Lack of CI/CD expertise:
- Unclear ownership:
- Restricting to Dev and QA Vs Prod environment:
- Neglecting Dynamic analysis:
- Difficulty to run UI automation:
- Hidden limitations of CI/CD vendors:
- Continuous integration for Android applications using Jenkins
- Continuous integration for iOS applications using Jenkins
- Continuous integration for Android applications using GitHub Actions
- Continuous integration for iOS applications using GitHub Actions
- Continuous integration for Android applications using Azure DevOps
- Continuous integration for iOS applications using Azure DevOps